19 Nov 2014

Craft Fair Season is here!

Craft Fair Season, top stall tips and some great craft fairs of the North.

It's Craft Fair Season, got to love it! All those beautiful handmade pieces, jewellery, socks and wacky house clutter! I love this season, not just because of the mulled wine often on sale too. But this post is not for the average shopper, instead I have decided to give you my top tips for running a stall, a Seller's guide.

In Kenya when I worked at Kenana Knitters, I used to turn up with heaps of stock and stationery and just wing it. Everyone knows everyone in Kenya and people stop and chat. But when I started my own business in the UK, Wildly Woolly (the sister company selling Kenana products to the UK market), I thought I better get serious as I wanted to share the story as best I could, and a messy stall does nothing for attracting customers. People don't often hang around at stalls long enough to see everything, so things need to pop out at them and catch their eye to make them stop and really look and listen! So below, as well as a list of the stall essentials, I have some tips on Do's and Don'ts for a stall holder which I have found work. 

So the essentials, I know some are obvious but it covers the lot, so don't forget to pack:
  • CHANGE! The most important, as people won't be bringing you the exact amount! I usually take around £50. To decide what to make this up of, look at your products and see what prices you have, Eg. if you are charging 3.95 then you will definitely need 5ps. But if someone is paying with a £20 then you will need £10, £5, £1 and the 5p. NB, you will need more of the smaller denominations.
  • You will need something to carry all that change in, and yes I know the bumbag (fannypack, waiste pack, belt bag - however you label it) is not the height of fashion, but trust me it's less stress than a money box, it's safer on you that sat on your table or under it. It's sad yes but theft does happen. I found a great plain black one in my local charity shop for £1, front zip for my money and back zip for everything else, business cards, pens etc)
  • Carry bags are essential as not many people will have somewhere to put it even if you have decided to wrap it up (jewellery etc). You can go as posh or simple as you like with this, I always think it's nice to have a slightly branded bag so people are reminded of you. I also like the thought that the bag will be recycled, so instead of plastic bags (the world is already filling up with them but I wont go on a rant) I go for paper bags which can be recycled. I like to put a personal touch on it so I bought a gorgeous stamp to brand my bags
  • You will need some sort of business cards or fliers, as a lot of people will ask you, and you may find you get lots of sales after the day from people getting in touch. So imperative to get something official. It's always a bit of putting when someone writes their email down on a piece of paper for me. I have to admit I don't think I've ever contacted anyone who did that - the paper gets lost or I forget what they did anyway. This leads on to the imperative facebook page, website etc as a way for people to see what you do.
  • A Table cloth, a must as you never know what the table you're given will be like, or the colour. Choose something plain, I think white is the best as it creates a nice clean background for your products to pop out from. If you have a busy background your products will just get swallowed up in the patterns.
  • Sign - Print out a picture of your Logo or name (just call yourself something - Emma's Homemade Jams?) and have it stuck on the front of the table or behind you on the wall. This helps you look professional and also adds to the attractiveness I think. I also like to have a framed A4 paper with a list of what makes my items special and different from the rest.
     Wildly Woolly's tag lines

  • There are lots of little bits and bobs that make the day easier, and the most important is Stationary. I take 2 pens (in case one runs out), a notebook for anything that I may need to note down or spare paper in case I need to scribble, scissors, bluetack, pins, string, receipt book, newsletter sign up book, price stickers/signs. The list could be endless but those I find are the main ones.
  • Some people like to set out a mock up of their stall in their living room the week before and have a play with lay out. That's one option, but I like to imagine it and draw it, so I spend time scribbling a few pictures of the table.The most important thing to bare in mind is to have some different levels, some higher and some lower. So for this you need:
  • Props, these don't have to be expensive, they can be anything you have in the house, although you may need more specific things like jewellery hangers (have a look on ebay). I like to use the basket drawers I salvaged from someone's skip, I asked permission before taking them! But they make a great prop as I have some of the drawers slightly open with things hanging out and also place things on top to add some height to the stall. At Christmas if you are selling decorations I think it's important to have a tree, as this shows off you products in situ! Have a brainstorm of what you have in your house, things you may not have thought of - wander round and imagine them on the table, you will be surprised what you already have.
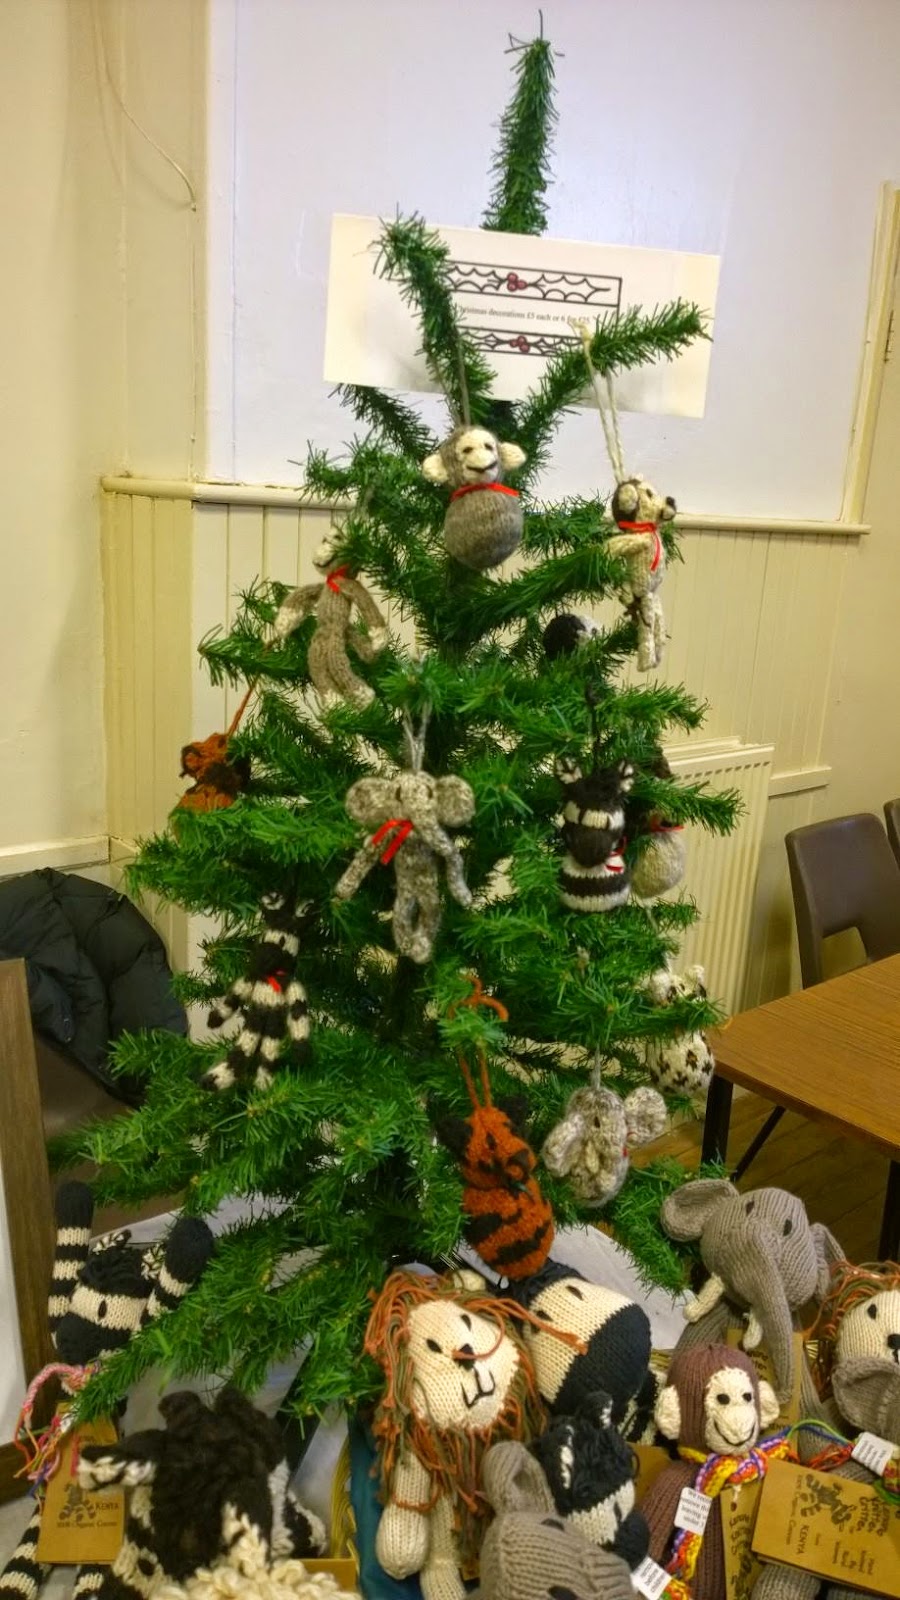
  • And finally, STOCK, don't go over board. Think about the size of your stall, and the sort of customers that will be coming. If it's a small one in a local village hall then your cheaper items are going to sell better as most people won't be carrying around loads of cash. Take a good range but keep a box of back ups under the table in case you find something sells really well. I usually take one or two of each of Wildly Woolly's bigger toys, and a few of each of the small ones like glove puppets.

Attracting Customers
There are a million ways you can attract customers, getting them to stop at your stall is half the battle, be creative in your ideas and make up your own. But here are some ideas to get the creative juices flowing. Have a bowl of sweets and get people to guess how many are in the bowl to win an item. Choose a number between 1-100. Drop your business card or email address in the bowl to win. If you just want subscribers to your newsletter then just ask for a sign up to win something. Whatever you decide remember that most people won't be there until the end so get them to pop down their emails or telephone so you can contact the winner, and remember you will probably have to post the item to don't choose something too large or you will be out of pocket!

Do's & Don'ts as a Craft Holder.
Lots of people set up their stall and then just sit and hope the customers will come and buy. But there's more psychology in it than that if you really want to do a great day of selling. There are a few things I have found that are Do's and Don't of Craft fair Selling:
  • DON'T just sit behind the table busily knitting or making and ignore people coming by. 
  • DON'T just continue the conversation with your assistant and ignore the customer, my sister says she hates it when people just carry on their conversation behind the table as she browses. Maybe it makes her feel like she's listening in and intruding?
  • DO stand up, preferably next to the stall and not behind, although sometimes that's the only option.
  • DO smile (even if your cheeks ache at the end of the day, you will have done more sales than if you don't), and say hello, make eye contact.
  • DO hand out business cards/fliers to those who show interest in your items.
  • Most importantly DO ENJOY YOURSELF. Chat, meet people, it's a great networking opportunity too so make the most of it.
Craft fairs in the North of England
Finally here are some of the great Craft Fairs in the North. Worth checking out and making a day or weekend of, or even signing up as a stall holder!
Don't forget to follow Wildly Woolly on Twitter and Like us on Facebook for Toys with a Tale, changing lives stitch by stitch!


31 Oct 2014

Autumn is here

A Wildly Woolly Autumn.

Well its been  a pretty mild transition into Autumn for most of us, and although the weather has been mild, Wildly Woolly has been going Wild - we've added our Christmas range to the website:

They've already been a hit and people have definately been starting early on the Christmas buying! The picture was from our stall at the Craft fair we did last weekend. Such fun and some great support, thanks!

We've been in the spotlight on an Ethical/Eco Blog we love called Moral Fibres, who told their fans about us and we had a special giveaway to thank them for their support for us! We gave away a small spider lion :

So Happy Halloween to you all, if you are a last minute person, like so many of us, here's a great website with receipes for Halloween treats www.totalbristol.com/eating-and-drinking/halloween-baking/
 Have a magical night trick or treating!

Next week, Don't Forget on Bonfire night to check your fire for Hedgehogs before lighting it.

Bring on a Wildly Woolly Winter with mince pies, sherry, warm fires and fabulous snow, and of course Christmas!


11 Sept 2014

Friendly Foraging and Homemade JAM!

At Wildly Woolly we're all about handmade, ethical and eco-friendly, so I wanted to share with you the tips and tricks to friendly foraging. It's so satisfying to make your own, especially when the main ingredients comes FREE!

So I'm taking Blackberry or Bramble Jam - an easy and delicious example.

What you need:
  • Old clothes - you will get blackberry juice on them!
  • 2 recycled tubs - one smaller for picking into (I use an old flapjack mini bites by M&S cylindrical one H12cm, W10.5cm), one larger (large enough to decant all your berries into).
  • A reusable bag, again an old one you dont mind a bit of a stain on.
  • A hedgerow near you, I use the side of the local golf course.
  • And of course - TIME - Don't rush, enjoy it!
So armed with your tubs, decked out in you old 'glad rags', head off to your chosen hedgerow. Don't forget to keep an eye out along the way for other bramble/blackberry bushes tucked away. It wont take long to find a great patch and once you have, put down your bag and take out the smaller tub, this will be your collector. VOILA - Start gathering!! Go for the big, juicy, dark purple ones, as the redder they are, the more sour they will be. Once you have filled the container, empty it into the larger one and carry on! Beware you will gain a few scratches in the process, just do it carefully and take it slow, the reward will be worth it.

I am a huge believer in being an eco-friendly or environmental forager, so remember the wildlife and insects that also roam that patch. If you see a spider or an insect allow them to escape before you 'jam' his berry-seat into your pot. Better to leave him there than wash him down the sink at home. I always try and leave some for the birds, they love them too so don't pinch the lot.

In August-September time the hedges are brimming with these delicious fruit so once you've filled your containers its time to head home. I gathered 3kgs from one small patch this year, a bumper crop, and that wasn't even half the hedgerow.

When you get home make sure you give all the berries a good rinse under the tap, this removes any leafy bits and sadly any insects remaining. I always pick out any floating ones, as I find these are usually not such nice ones. Measure your weight in berries... I used a receipe from the internet but I have my trusty River Cottage Preserves handbook for all the other tips and tricks to jam making.

Generally its 1kg berries to 1kg granulated sugar. Here's what I did:

1kg Blackberries
1kg Granulated sugar
1 packet of pectin (from any local supermarket)
1 Lemon

1 Large saucepan/soup pan
7-8 glass jars (ask family, friends and neighbours to save their old jars for you)
1 Jam funnel (optional but less messy!)
1 jam/preserving thermometer (optional)


Here I added some apples for extra pectin, but the receipe I am giving you here doesn't need these. Feel free to experiment though!


First you need to sterilise your jars, I just boil them in a large pan. But you can wash them in hot soapy water and then dry them in a warm oven. Otherwise a hot wash in the dishwasher does the trick. Dont forget them lids too!

So put all your berries into the large saucepan and bring to a gentle simmer, simmer until all the fruit is soft and pulpy. Bring it to the boil adding the sugar as it begins to boil, stir constantly until the sugar has all dissolved. Add the squeezed lemon juice. Allow it now to boil without stirring until it reaches the 'jam' temperature on the preserving thermometer (otherwise boil for a minimum of 5 mins. It must have reached 104.5degrees c to set).


Skim any foam off the top and then pour into the jars and seal as quickly as possible. Use within 12 months.

TaDahhh!! Enjoy!


31 Jul 2014

GLOVE PUPPETS - Handmade, Unique, Ethical, Natural and just Oh So Cute!!

So we've finally got everything together and we're about to launch our latest product at Wildly Woolly Ltd! For those on our Wildly Woolly Fan's newsletter (sign up NOW if you want to be a fan and get our latest news first) it's almost the long awaited moment.

Kenana Knitters' Glove Puppets have arrived and we've got a wonderful variety:
  • Cow
  • Sheep
  • Elephant
  • Monkey
  • Lion
  • Zebra

The wonderful Cow glove puppet!


These magical Critters are great accessories for story times with young children, for interactive play and to excite their imaginations. They make ideal small gifts.


As with our other products, the glove puppets can all be washed on a wool cycle (see Wildly Woolly's FAQs for more details on wool washes).

So by the end of today Wildly Woolly will have these lovely Critters up for sale.
 CHECK IT OUT!


Asante sana - Thank-you, for empowering women with the help of your child's smile!


Brilliant blog posts on 
HonestMum.com


14 Jul 2014

Being Gluten Free - 5 Top Tips

I have been Gluten Free for over 10 years now, and yes in the early days it was very hard, it wasn't as well recognised as it is today. There weren't the substitutes there are today - breads, pastas and biscuits. And yes I was about a stone lighter!

But today I look at it as being EASY, and you will too with these top tips for those of you GF or cooking for a GF.


The most important tip to bear in mind overall is that it's Trial & Error - Yes, in the beginning it's going to be more hard work that just grabbing a receipe and going for it. You will have to stop and think about it, BUT it's trial and error, try something and if it doesn't turn out how it should (make sure you taste it first as sometimes what GF lacks in the looks department, trust me, it makes up for it in the taste department - a GF person will really appreciate a tasty treat when the other option is nothing!), just try again in a slightly different way.


  1. Use a mixture of flours, most gluten free flours you buy in the shops are a mixture of a number of different flours, to name a few - tapioca, maize, rice, potato, buckwheat, and gram flour. The bought ready mixed packets can be expensive and although useful when starting out, I do suggest later on sourcing the individual flours separately and mixing them yourself, start with 1/3 of three varieties ie if the receipe says 300g use 100g of each (again trial and error to see what mixes make the best cakes/pastries/biscuits - it will vary).
  2. Keep a receipe book, when you try a receipe jot it down in your receipe notebook and then make comments underneath to remind yourself how to try it differently later on or if it was a great one. This way you will get to a point where you can just grab a receipe (of your own) and get on with it!
  3. Xanthan Gum, the issue with GF flours is that they dont have the GLUTEN which is the gloopy (for want of a better word) stuff that hold the flour together and makes its stretch when you make dough, the elastic part. So we need to make sure we compensate for that - eggs are a good way of making things stick. I often use a regular receipe and sustitute the flour for GF (a mixture of those above if I havent any 'bought' packets) but I will add an extra egg if the receipe says to uses eggs. But a magical ingredience is something called Xanthan Gum which you add to the flour mixture, it comes in a powder form usually in a small pot/tube (Xanthan Gum is found in most regular supermarkets, look in the free from section or the baking section, otherwise ask!).
  4. Fruity baking, if you like fruity cakes then you're in luck, these kinds of GF cakes seem to work much better. Possibly due the extra stickiness the fruit brings to it, but I suggest you try all forms of 'fruit' cakes - dont be afraid to explore, there's so much fruit out there! Plus its feels healthier!

 Finally, a few words of wisdom. I always take with me a packet of plain rice cakes when ever I go away, atleast when everyone else is tucking into sandwiches you can pull out you rice cakes add a few toppings and tuck in too. But don't forget to ask if you're at a restaurant or B&B as a lot of places do have GF products for people like us, they just forget to advertise it! I know Premier Inn often have GF products available if you ask, and these days you can request GF meals on the aeroplane if you get served food on the flight, so remember to tell your travel agent to request it, as its too late when you're already on the plane.


Below are a few website I found useful:
  • For the best Yorkshire puds receipe - http://www.dovesfarm.co.uk/recipes/yorkshire-puddings/
  •  For GF pancake with just 2 ingredients - http://www.theskinnyconfidential.com/2012/09/25/ummm-seriously-dying-ingredient-pancakes-flourless-full-protein/ 
  • For Xanthan Gum online - http://www.dovesfarm.co.uk/flour-and-ingredients/baking-essentials/xanthan-gum-1-x-100g/